I have been selling quite a few of my Bearpaw handmade goods over the last few weeks, through my 'real' shop (including 2 of the patchwork box cushions and 2 of the tote bags I featured on here recently!).
So I needed to replenish my stock of 'Bearpaw labels'. And because I have now perfected what I think is a really neat way of making these, I decided to share it with you in this little tutorial (my first ever 'tute'!).
You will need:
Printer paper
Scraps of felt
lengths of ribbon or braid
pinking shears
First of all design your label. I have an ex-graphic designer for a husband, so I just asked him! He designed me a back and a front and set them on to a label template. This means that I can use the same artwork to print out sticky labels that I use on my giftboxes.
I know some of my readers are a dab hand on the computer, so you might be able to produce your own artwork!
Cut your labels out (as above) and then cut out rectangles of felt, a few milimetres (about 1/8") bigger all round than the label with pinking shears.
Cut out a length of ribbon (I use the cheapest I can find!) approx. 22cm (9") long and fold in half and hold in place as above.
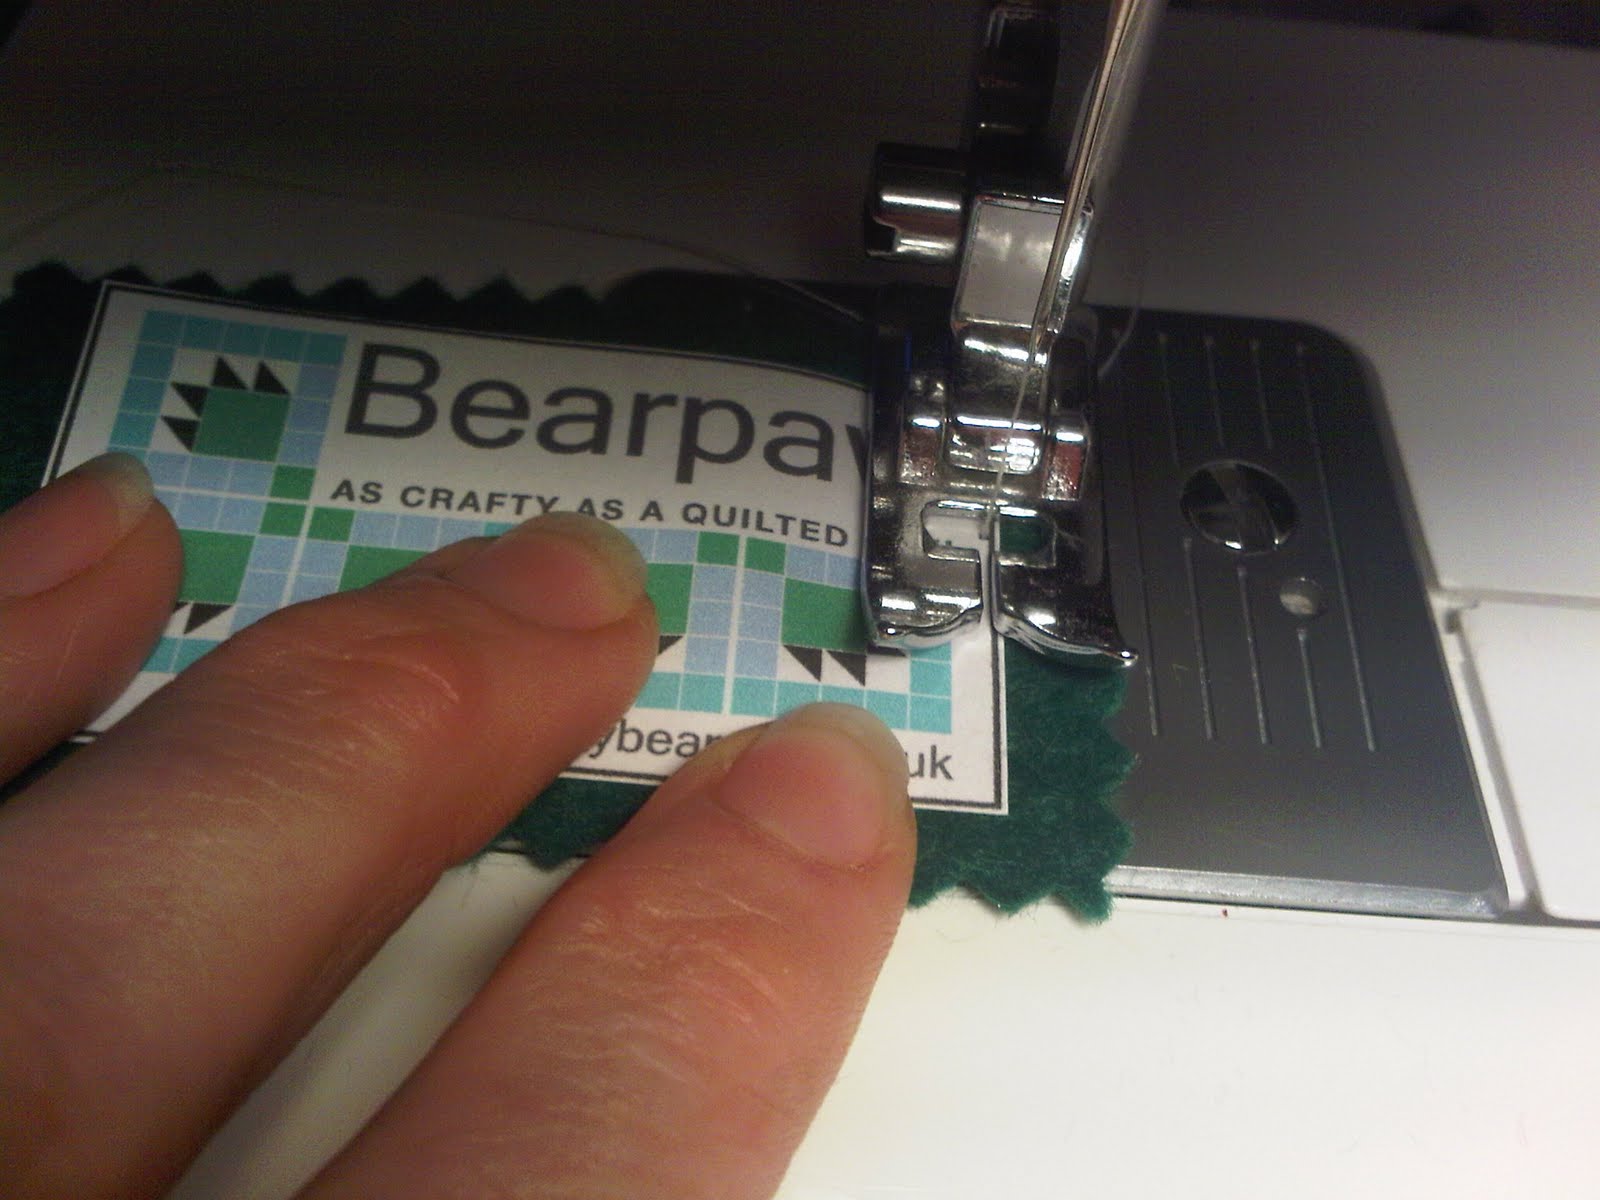
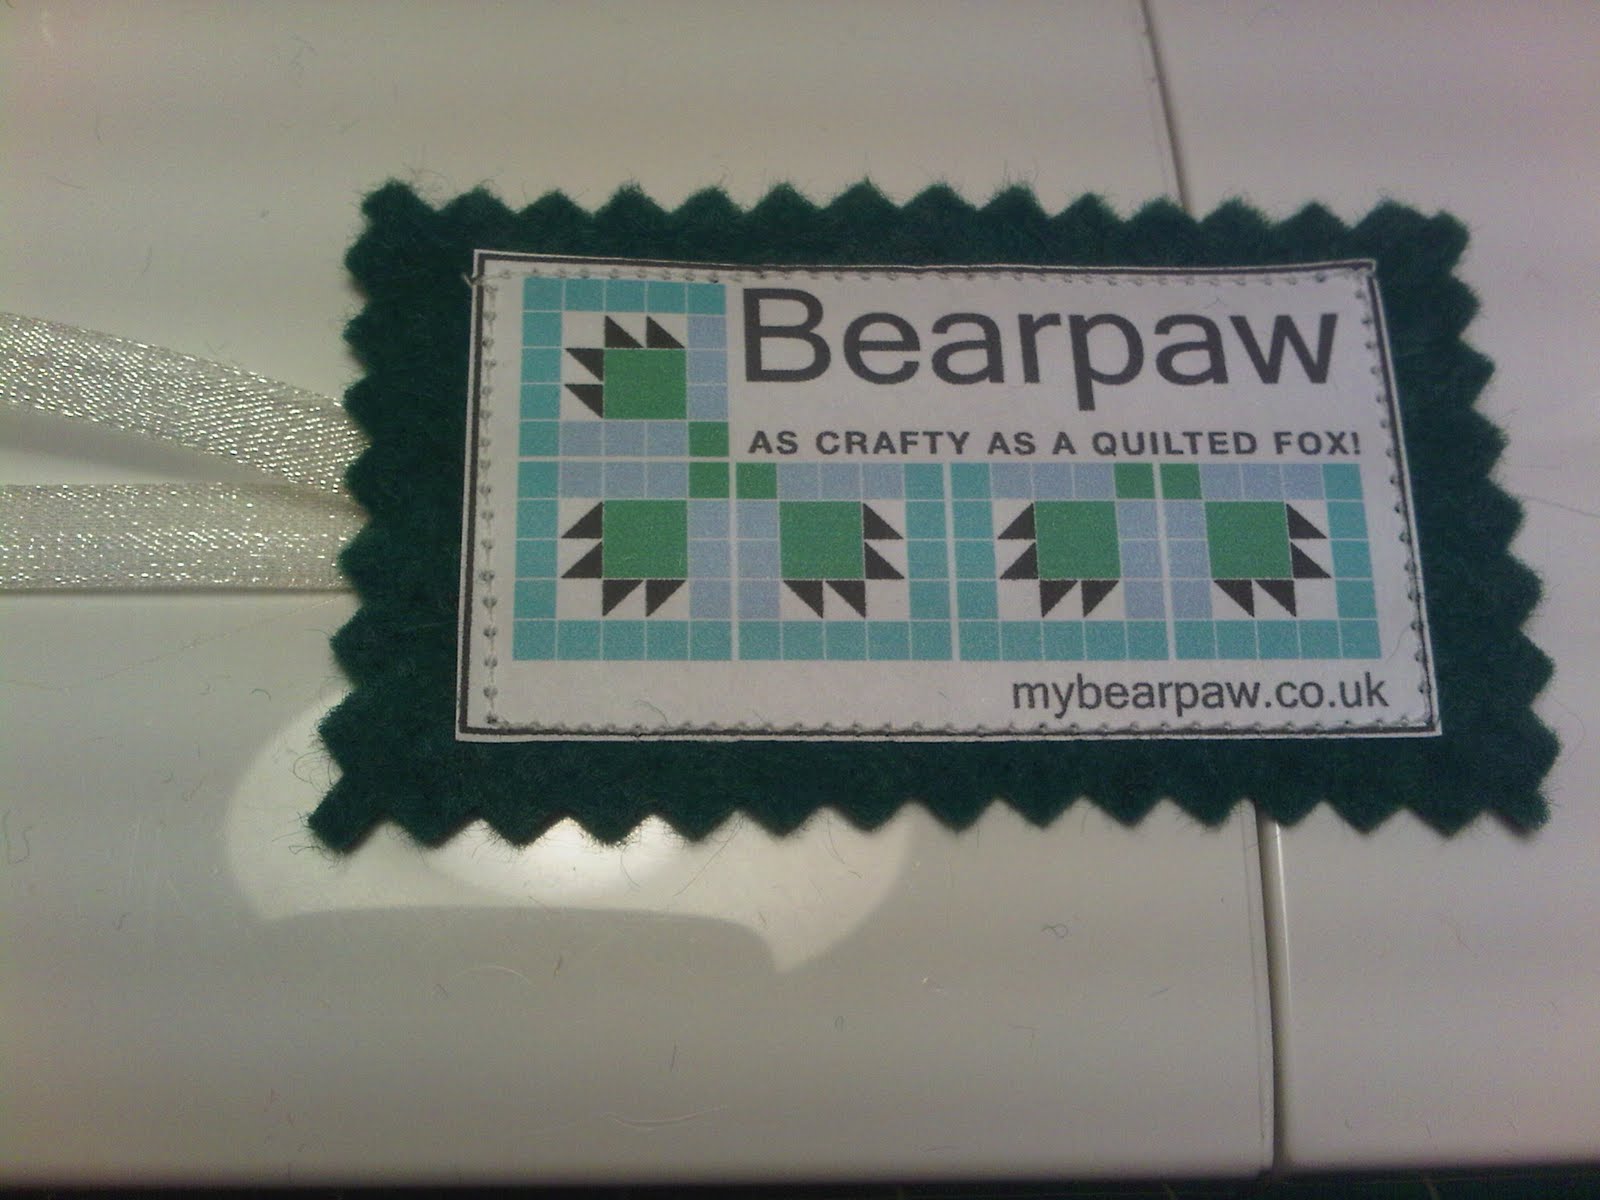
Lay the back label on top of the felt, covering the ribbon, and stich all the way round (a few mm's from the edge of paper label). So that it looks like this:
Turn the label over and place the front printed label on top and stitch this even closer to the edge, so you cover up the stitching from the back.
And there you go. All ready to tie on to some nice handmade gift or produce.
I hope you found this helpful and easy to understand. As this is my first tutorial, any feedback, good or bad, would be most welcome!